Connecting FeedHenry to Fuse REST Quickstart

Connecting FeedHenry to Fuse REST Quickstart

This guide demonstrates step-by-step how to connect a FeedHenry Hello World application to a JBoss Fuse REST quickstart backend running on Red Hat’s OpenShift Online.

Here are a few assumptions before you begin:

Once you’ve completed the prerequisite blog guides, connecting the two is a simple matter of modifying a few files. You can even use the browser based editor so you can do everything online.

Log into your FeedHenry domain and find your previously created Hello World project.

Explore Project

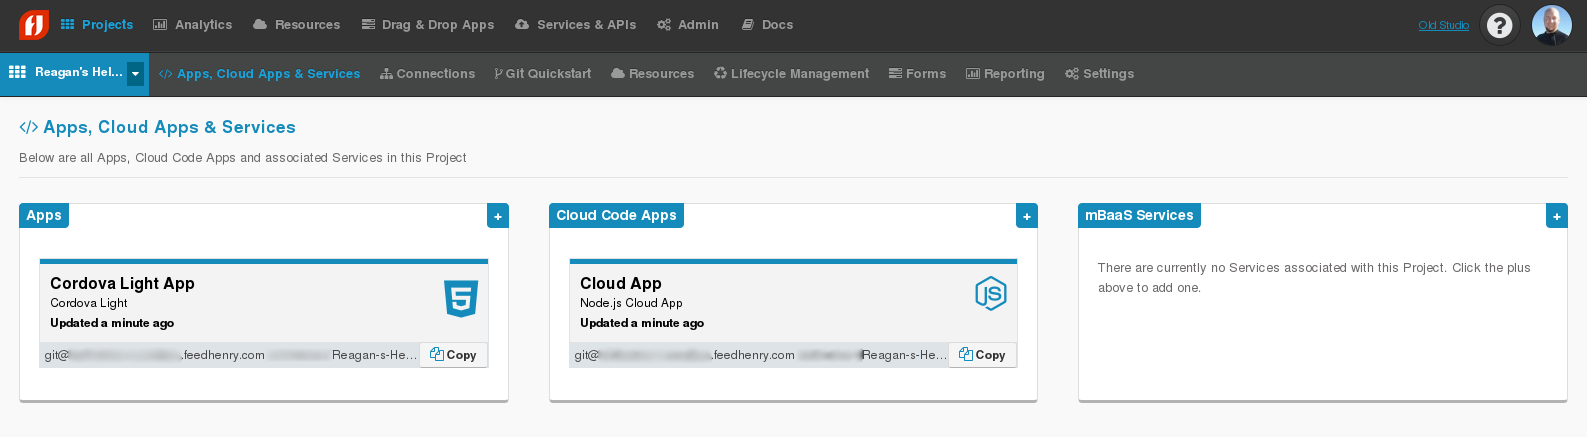
Step 1: Modify the Hello World Cloud App

First, you’ll modify the cloud app files. Click on the “Cloud App“ panel shown below.

Explore Project

Next, click on the “Editor“ button in the column on the left.

Explore Project

Edit the /package.json file and add a dependency for “xml2js“ version “~0.4.8“ to the end of the dependencies section. If you’d like, you can copy/paste the entire contents from the text below.

1
2
3
4
5
6
7
8
9
10
11
12
13
14
15
16
17
18
19
20
21
22
23
24
25
26
27
28
29
30
31
32
33
34
35
{
"name": "fh-app",
"version": "0.2.0",
"dependencies": {
"body-parser": "~1.0.2",
"cors": "~2.2.0",
"express": "~4.0.0",
"fh-mbaas-api": "~4.9.0",
"mocha": "^2.1.0",
"request": "~2.40.0",
"xml2js": "~0.4.8"
},
"devDependencies": {
"grunt-contrib-watch": "latest",
"grunt-nodemon": "0.2.0",
"grunt-concurrent": "latest",
"supertest": "0.8.2",
"should": "2.1.1",
"proxyquire": "0.5.3",
"grunt-shell": "0.6.4",
"istanbul": "0.2.7",
"grunt-env": "~0.4.1",
"load-grunt-tasks": "~0.4.0",
"time-grunt": "~0.3.1",
"grunt-node-inspector": "~0.1.5",
"grunt-open": "~0.2.3",
"grunt-plato": "~1.0.0"
},
"main": "application.js",
"scripts": {
"test": "grunt test",
"debug": "grunt serve"
},
"license": "mit"
}

Next, edit the /lib/hello.js file and replace its contents with the text below. Make sure to replace the uri field in both the get and post methods with the URI to your Fuse REST quickstart that you created in the previous guide.

1
2
3
4
5
6
7
8
9
10
11
12
13
14
15
16
17
18
19
20
21
22
23
24
25
26
27
28
29
30
31
32
33
34
35
36
37
38
39
var express = require('express');
var bodyParser = require('body-parser');
var cors = require('cors');
var request = require('request');
var xml2js = require('xml2js');

function helloRoute() {
var hello = new express.Router();
hello.use(cors());
hello.use(bodyParser());

hello.get('/', function(req, res) {
console.log(new Date(), 'In hello route GET / req.query=', req.query);
var id = req.query && req.query.hello ? req.query.hello : '000';
request({uri: 'http://restchild-joshdreagan.rhcloud.com/cxf/crm/customerservice/customers/' + id,
method: "GET"}, function (error, response, body) {
xml2js.parseString(body, function (err, result) {
var name = result.Customer.name[0];
res.json({msg: 'Hello ' + name});
});
});
});

hello.post('/', function(req, res) {
console.log(new Date(), 'In hello route POST / req.body=', req.body);
var id = req.body && req.body.hello ? req.body.hello : '000';
request({uri: 'http://restchild-joshdreagan.rhcloud.com/cxf/crm/customerservice/customers/' + id,
method: "GET"}, function (error, response, body) {
xml2js.parseString(body, function (err, result) {
var name = result.Customer.name[0];
res.json({msg: 'Hello ' + name});
});
});
});

return hello;
}

module.exports = helloRoute;

Finally, edit the /README.md file and change the sample request body to “123“ instead of “world“. If you’d like, you can copy/paste the entire contents from the text below. This step is optional, but is nice to do since it will allow you to test directly from the “Docs“ page.

1
2
3
4
5
6
7
8
9
10
11
12
13
14
15
16
17
18
19
20
21
22
23
24
25
# FeedHenry Hello World MBaaS Server

This is a blank 'hello world' FeedHenry MBaaS. Use it as a starting point for building your APIs.

# Group Hello World API

# hello [/hello]

'Hello world' endpoint.

## hello [POST]

'Hello world' endpoint.

+ Request (application/json)
+ Body
{
"hello": "123"
}

+ Response 200 (application/json)
+ Body
{
"msg": "Hello world"
}

Now, save all of the files and click on the “Deploy“ button in the column on the left.

Deploy Project

That should bring you to the “Deploy“ page. Click on the “Deploy Cloud App“ button.

Deploy Project

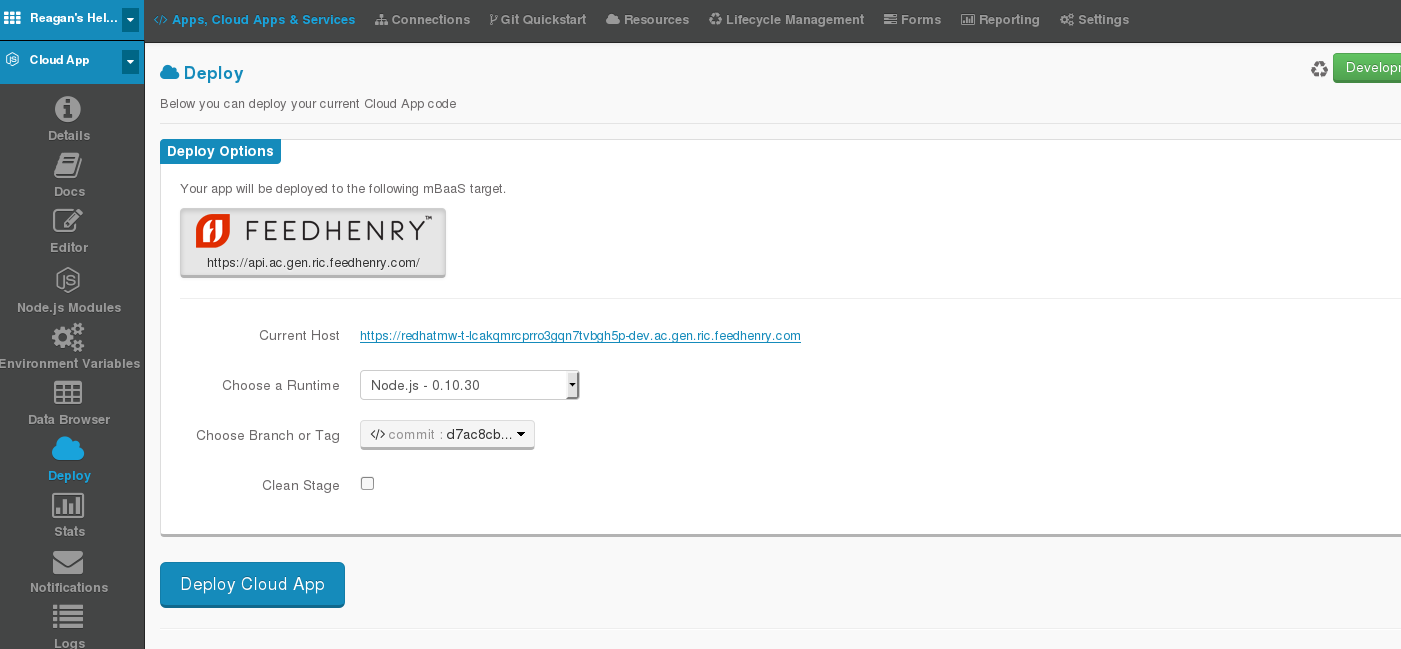
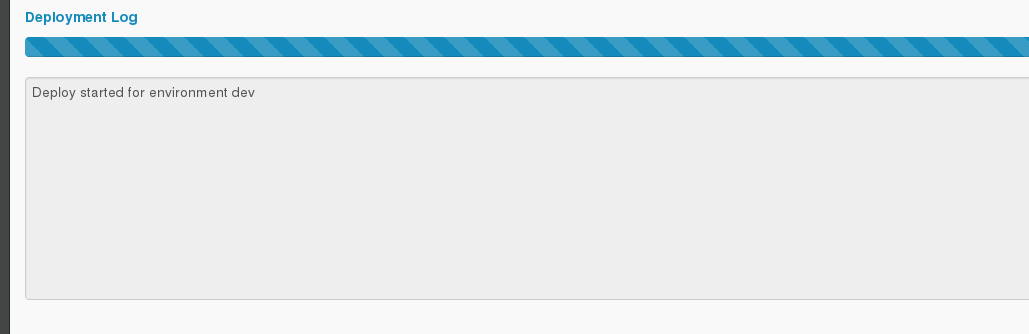
Deployment should take less than 1 minute. You will be shown a progress bar and status text box.

Deploy Project

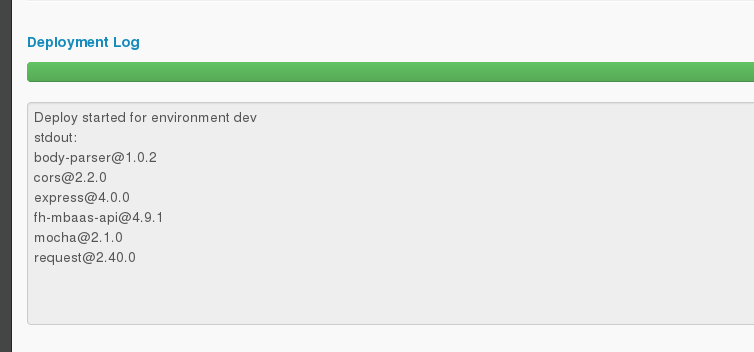
When the deploy process is complete, you will see a green progress bar and no errors in the status text box.

Deploy Project

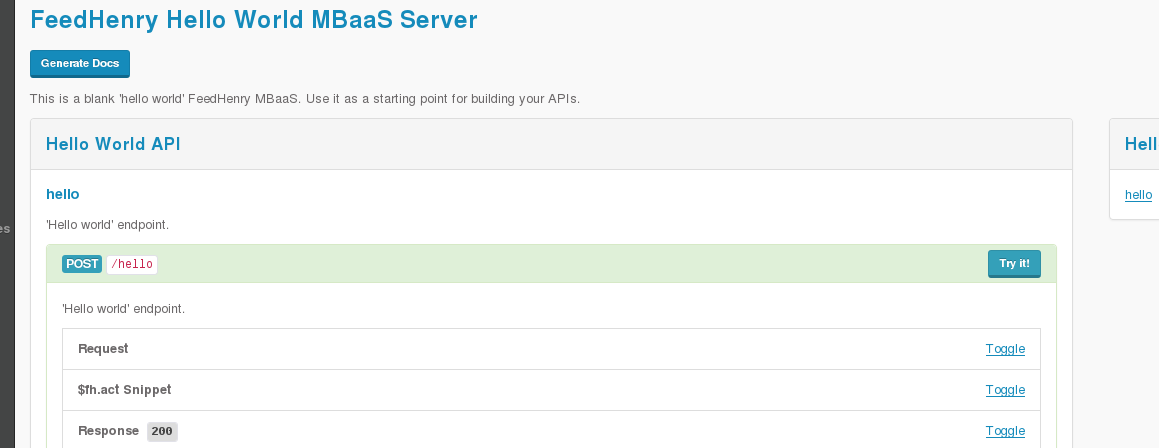
Once everything deploys successfully, you can click on the “Docs“ button in the column on the left.

Test Project

This will take you to the test page for your app. It should look like the picture below.

Test Project

Click on the “Try it!“ button to expand the request & response text boxes.

Test Project

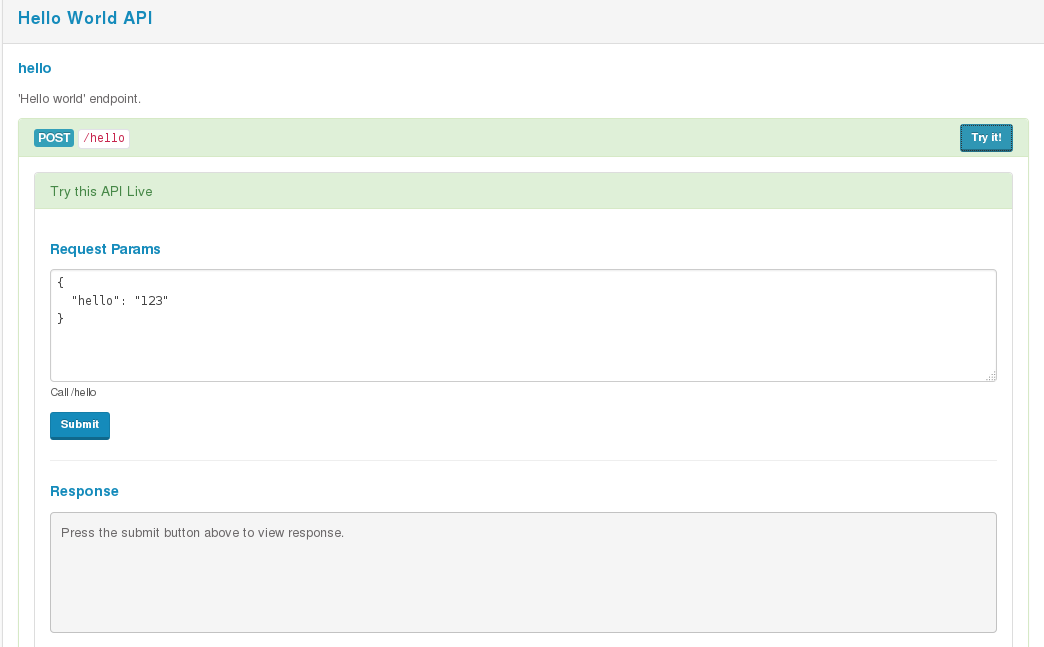
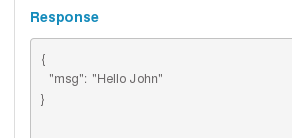
Click on the “Submit“ button to invoke the service. You should see a successful response like the one pictured below.

Test Project

Step 2: Modify The Hello World Cordova Light App

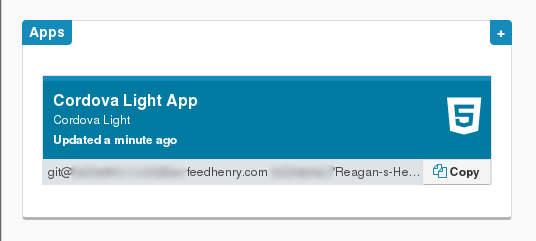
Now, you’ll modify the Cordova application files. Click on the “Cordova Light App“ panel shown below.

Explore Project

Next, click on the “Editor“ button in the column on the left.

Explore Project

Edit the /www/index.html file and replace the placeholder text for the input box with “Enter Your ID Here.“. If you’d like, you can copy/paste the entire contents from the text below.

1
2
3
4
5
6
7
8
9
10
11
12
13
14
15
16
17
18
19
20
21
22
23
24
25
26
27
28
29
30
31
32
33
34
35
36
37
38
39
40
41
42
43
44
45
46
47
48
<!DOCTYPE html>
<head>
<meta charset="utf-8">

<meta name="viewport" content="width=device-width, initial-scale=1, user-scalable=no">

<title>Hello World</title>

<link rel="stylesheet" href="css/app.css">
</head>

<body>
<header class="header-footer-bg">
<div class="center">
<h3>FeedHenry
<small>QuickStart - HTML5</small>
</h3>
</div>
</header>

<div id="count" class="">
<div id="formWrapper">
<p id="description">This is a basic Javascript App that can take in your name, send it to a cloud app and display the response.</p>
<br>

<div class="input-div">
<input id="hello_to" type="text" class="input-text" placeholder="Enter Your ID Here."/>
</div>

<br>

<button id="say_hello" type="button" class="say-hello-button">Say Hello From The Cloud</button>
<div id="cloudResponse" class="cloudResponse"></div>
</div>
</div>

<footer class="header-footer-bg">
<div>
<small class="right">
<!-- v.&nbsp; -->
</small>
</div>
</footer>

<script src="feedhenry.js"></script>
<script src="hello.js"></script>
</body>
</html>

Don’t forget to save the file. The simulator on the right should automatically update. Don’t worry if it doesn’t. Sometimes it needs a page refresh. However, since the changes we made were purely cosmetic, it doesn’t really matter if you see the update.

Test Project

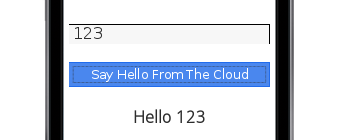
Enter “123“ into the input box on the simulator and click “Say Hello From The Cloud“.

Test Project

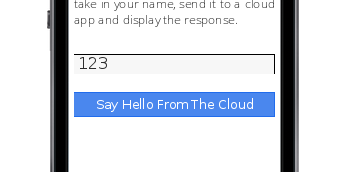
If everything was successful, you should see a response like the one pictured below.

Test Project

Now you’ve successfully wired your FeedHenry Hello World project to a backend Fuse REST quickstart running on OpenShift.

Author

Josh Reagan

Posted on

2015-05-08

Updated on

2015-05-08

Licensed under